 Number 291 - August 2007 |

|
| Turn Photos to Graphics | |
|
by Stan Sterdan, Big Blue and Cousins, The Greater Victoria PC Users' Association, June 2007 | |
|
Here is a fast down and dirty technique for turning a photo into an image that resembles the type of painting you might find on some china, or the old tea or biscuit tins. 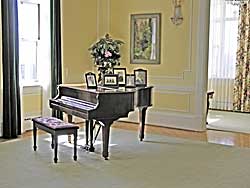
Original photo by Louis Coppens before cropping, and adjustments (by Les Benson using Stan's directions) It's a fun piece to get you exploring some of the features in your editing program. It should work in any program that supports layers (or in Corel terminology--objects). Here is a fast down and dirty technique for turning a photo into an image that resembles the type of painting you might find on some china, or the old tea or biscuit tins. Photoshop 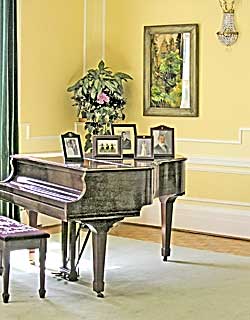
Original image after cropping, etc. |
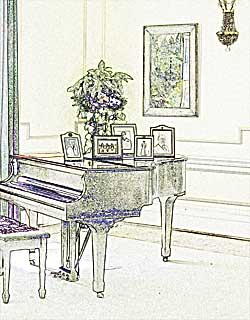
After step 3--find edges The same effect can be achieved by changing the blending mode in your layers pallette. (If you use the edit/fade option, you can't go back... if you use the layers version you can twiddle with it afterwards to change or get better effects.) It's much easier to do and faster than it was to type this out. 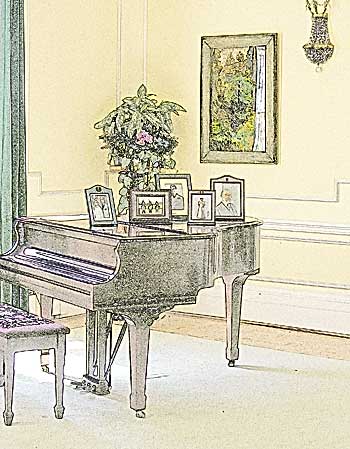 If you are using Corel Photo-Paint it's pretty much the same procedure. Have fun and experiment! You'll learn more that way. |
|
Number 291 - August 2007
|
|